Recapping, doing it right. Complete GUIDE How to do it.
Today on Facebook on the “Commodore Amiga” group I noticed a link to: https://console5.com/wiki/Converting_from_Surface_to_Leaded_Capacitors
And he who posted it asked about the opinions of using Holethrough caps.
And well again I was reminded of a horrible motherboard sent to me for a fix after a failed recap.
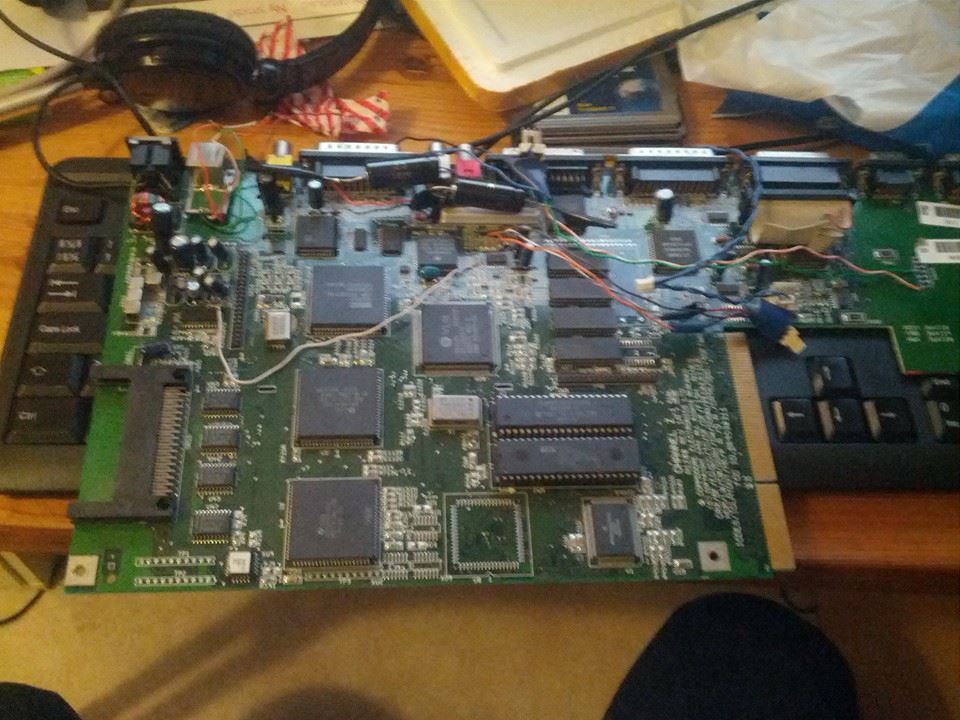
This was the board, YES! that two black things at keyboardconnector sure IS 22uF caps.
So let us go through some basic stuff:
WHY Recap?
ok, Amiga 600, 1200, 4000, CD32, CD32 FMV Module, A4000 030 and 040 CPU cards all suffer of leakage. When the caps leaks it eats up your motherboard and after a while destroys it. OFTEN it is noted by bad composite out, bad audio. also effects like nonboot (CD32, A600), or cracking noises or distorded audio.
And when you have issues like distorded audio, just a change of capacitors will not do it (recap) so it is better to have your machine recapped BEFORE you are having any issues.
How to notice leakageissues? Well first of all, not always those issues are visible. a board can look perfectly fine and when removing caps you notice leakage.
BUT often you can see some dull colors at the bottom of the caps, like this example:
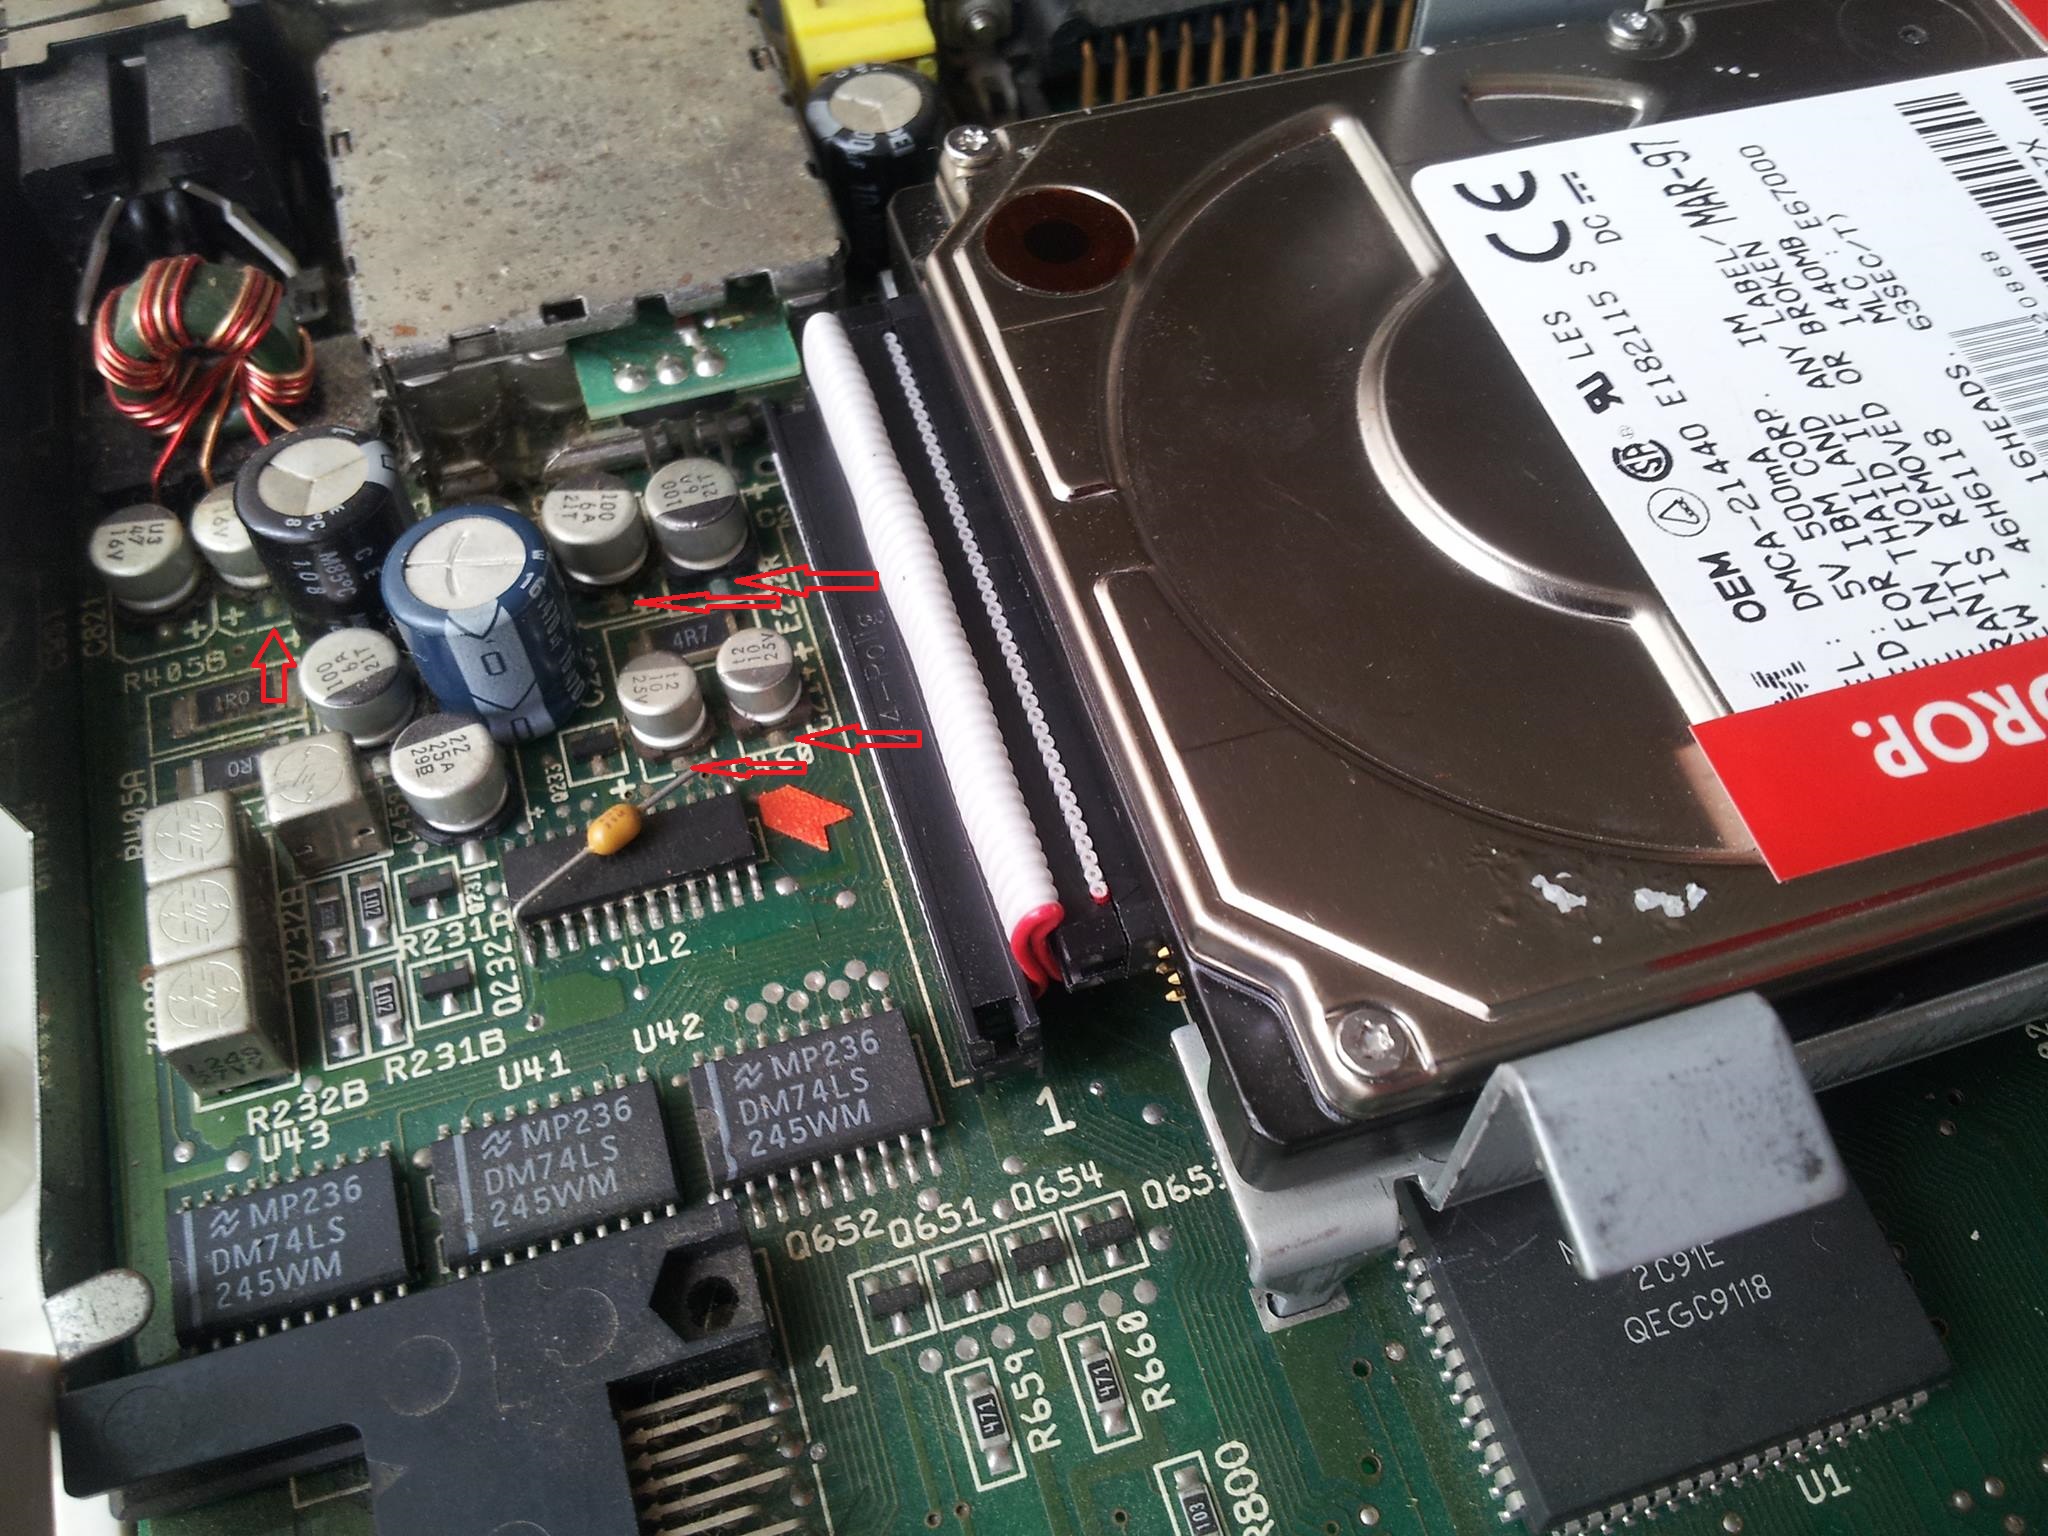
at the arrows you can see that there is a grey/greeish color and not as shiny as it should be. the darker the worse.
So what you need to do is to replace them, and I would recomend to change them all while doing it.
so.. HOW do you remove it? at the link at the top, they say that you can twist them off.
ok. well you CAN take your magnum and SHOOT them off the board if you like to. But it is TOTALLY wrong.
WHY?
Simple, look at the board, the pads they are small. (like 2x3mm) and are glued to the PCB. they are not designed for the force applied when removing the caps with force. it CAN work but it can also fail so you need to do a lot of extra work, especially when dealing with weakend pads due to the leakage. so twisting, wiggeling, cutting them off stresses the PCB more then it was designed for, especially with old stuff like the Amiga. There are only 2 days that works good:
- Hot Tweezers, this is like a tweezer of 2 solderingirons, heating up both spots at the same time, so you can easy remove them
- Hotair station, there are really ok hotairstations now for more or less nothing on E-Bay like the Atten 858D, they are really nice, and with a temperature of aprox 280 degrees it is quite easy to remove the caps without damaging surrounding plastics.
So simply: Do NEVER apply force when removing SMD caps, NEVER EVER. there is no excuse even if it MIGHT work most of the times. but usually you DO rip a pad or so making the recap much harder.
OK. New caps then. what to use?
First of all: Commodore have calculated a lot when designing the machines, of types etc. BUT also: during production you want to cut costs. You simply does not put in the best stuff as it costs too much, and ACTUALLY . you want customers to buy more machines later, so they should not last too long.
Through-hole caps: again, in the link above he uses throughhole caps.
YET again, this is just WRONG!. even if they MIGHT leak less (they sure can leak aswell!), again they are not designed for SMD installation. SO the pads on the PCB is stressed from the caps. Vibration if you move it, expansion when the machine gets hot/cold. Remember it took aprox 20 years before there was issues with the LOW QUALITY caps commodore used, the stress from holethrough caps can also take several years before they get noticed.. at my picture above, I do not need to tell you that the pads for the audiocaps (22uF, the BIG black ones) was loose. but also pads for other locations replaced with holethrough caps.
There is NO reason whatsoever to put in holethrough caps except one thing: You cannot solder SMD! and that is false as it is actually HARDER to solder in trough hole caps on SMD locations then real SMD caps.
Ceramic Caps: Well People are putting in ceramics instead as “they will not leak”. This is very true YES, instead they short and makes very ugly HARD to repair burnmarks on the motherboard. AND also they have totally different
characteristics than electrolytes. So it will not work as Commodore designed it for.
Tantalum Caps: Ok this is somewhat better then Ceramics, but yet again, different
characteristics than electrolytes, they do not leak, true. intead they can explode making more damage on the motherboard, also handles ripple etc different.
One VERY simple rule here: keep within the same type then it will work as Commodore once planned to it. a booting machine is NO proof of working caps whatsoever. remember that the Amiga boots without any of the electrolytes installed (but no audio, composite out etc.. but will boot) so even with leaking BAD caps it can behave like it works.
I myself use Panasonics Hybridcaps. (a nonformatted list at the end of this post) that have proven to work just fine, they DO cost some. but this is the Amiga, it is worth it.
OK enough of ranting and so. lets do the COMPLETE guide of recapping.
Some months ago I made 2 short videos of it:
https://www.youtube.com/watch?v=5DB56v_p80k
but here is the Complete guide for persons who cannot solder:
- Open your Amiga
- Remove motherboard, put it into a ESD Bag
- Contact a peson with good reputation of recapping using SMD electrolyte caps
- Ship it to the person above
- Wait
- Recieve Package from person
- Install motherboard into your case
- Enjoy
SIMPLY!: if you need a guide: DO NOT DO IT!.
Interested to learn? dig up D-Link routers, remove components, replace them on and on and on again until you do not make misstakes.. THEN you can do your Amiga rework. NEVER EVER practise on the Amiga. it MIGHT look simple, but I have got so many board with problems as people practised on their beloved Amigas.
removing components from the Dlink etc might be harder as they use leadfree solder, but then you learn more.
So simply: NO force when removing caps, no throughhole, and keep the same type.
A working list of caps for the Amiga computers using SMD:
A4000:
5 SMD 22 uF 35 VDC, EEHZA1V220R (NOTE! 2 of the mounted wrong on motherboard)
10 SMD 47 uF 35 VDC, EEHZA1V470P
1 SMD 100 uF 25 VDC, EEHZA1E101XP
1 SMD 10 uF 50 VDC, EEHZA1H100R
2 SMD 4.7 uF 35 VDC, EEEFK1V4R7R
2 470 uF 25 VDC, EEUFR1E471 (Through hole)
(Rev D Motherboard: add 2 22uF)
A4000T:
6 SMD 22 uF 35 VDC, EEHZA1V220R
14 SMD 47 uF 35 VDC, EEHZA1V470P
11 SMD 100 uF 25 VDC, EEHZA1E101XP
3 SMD 10 uF 50 VDC, EEHZA1H100R
15 SMD 4.7 uF 35 VDC, EEEFK1V4R7R
3 470 uF 25 VDC, EEUFR1E471 (Through hole)
A1200
5 SMD 22 uF 35 VDC, EEHZA1V220R
2 SMD 47 uF 35 VDC, EEHZA1V470P
4 SMD 100 uF 25 VDC, EEHZA1E101XP
3 SMD 10 uF 50 VDC, EEHZA1H100R
2 470 uF 25 VDC, EEUFR1E471 (Through hole)
2 1000 uF 10 VDC, EEUFR1A102L 6 (Through hole)
(A600: add one 10uF more)
CD32:
6 SMD 22 uF 35 VDC, EEHZA1V220R
5 SMD 47 uF 35 VDC, EEHZA1V470P
9 SMD 100 uF 25 VDC, EEHZA1E101XP
4 SMD 10 uF 50 VDC, EEHZA1H100R
4 SMD 4.7 uF 35 VDC, EEEFK1V4R7R
1 470 uF 25 VDC, EEUFR1E471 (Through hole)
2 1000 uF 10 VDC, EEUFR1A102L (Through hole) (NOTE! mounted wrong on motherboard)
A3640:
5 SMD 22 uF 35 VDC, EEHZA1V220R (3 are mounted wrong on PCB)
A3630:
4 SMD 22 uF 35 VDC, EEHZA1V220R
I have no list for FMV module for CD32.
Those caps are of a MUCH better quality than the original ones and will hold extremly longer period of time. I would guess atleast 30+ years.