A600: Custom audio mixer & mounting MAS-Player inside!
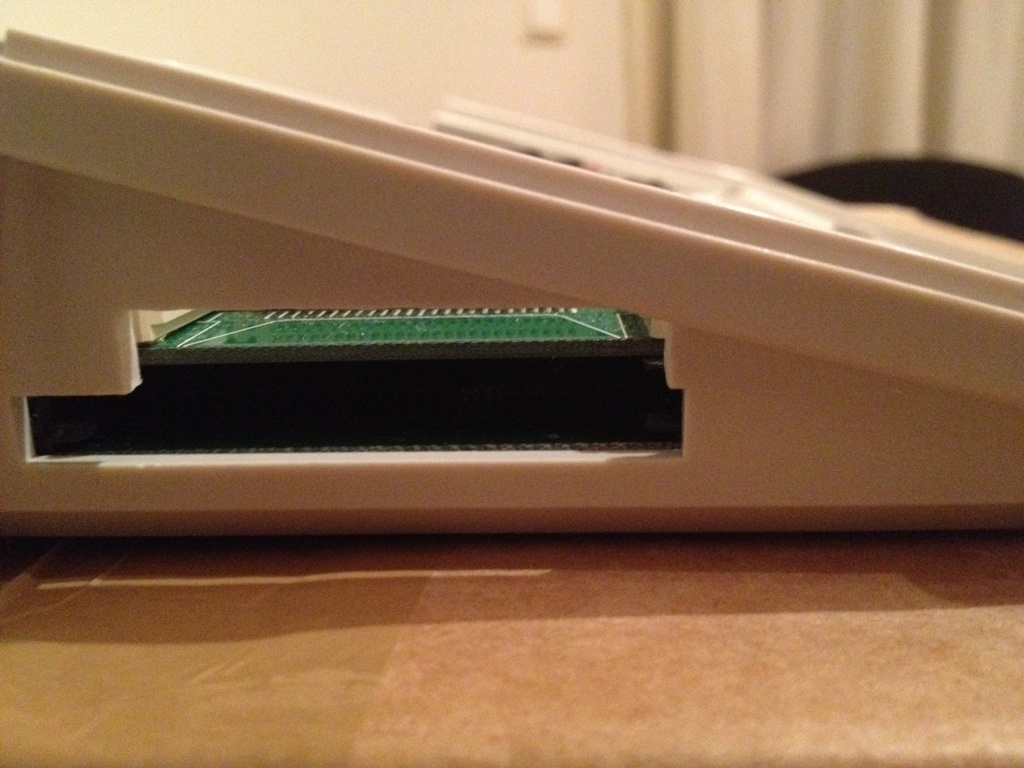
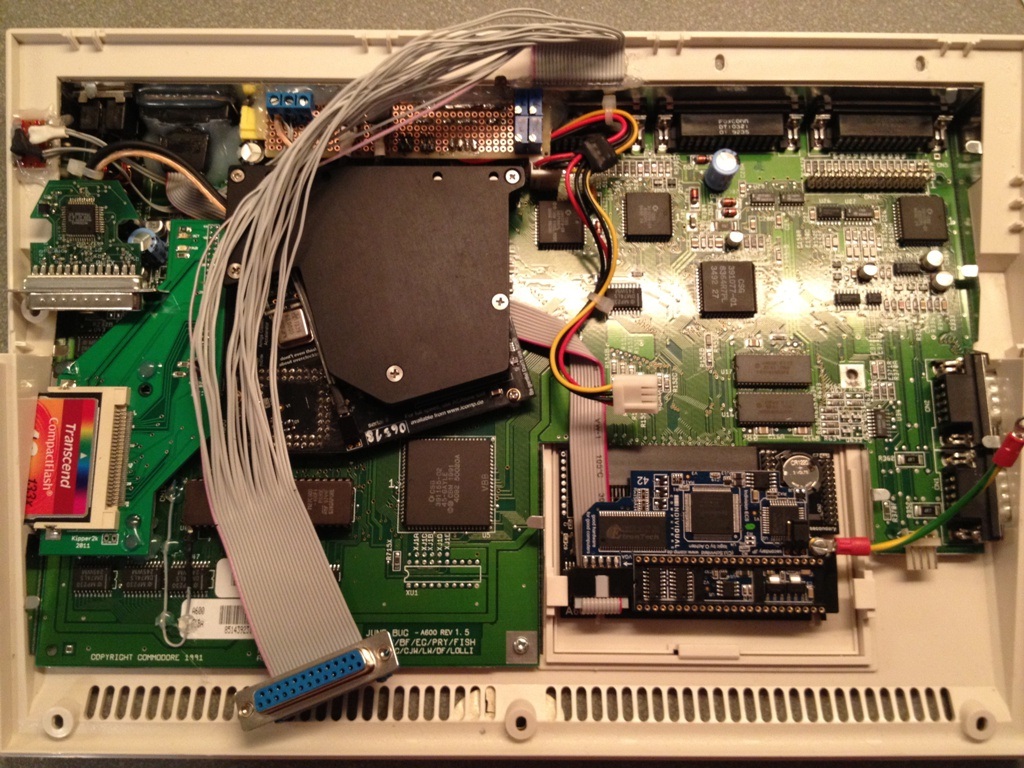
First of all, I had to do the boring stuff of cutting the case above the PCMCIA port just to install the perfect CF2IDE adapter by kipper2k which I had for a really long time :)

OK it's done...
By the way, the last 2 days I was thinking of putting my beloved MAS-Player inside my A600 beast, clearly cause it would be really cool!
Well, easy into thinking, difficult into implementing it though. Such obstacles are the following:
- MAS-Player is mounted on Parallel port.
- MAS-Player requires a +5V wire that by default is drawn from the near Serial Port.
- MAS-Player gives an extra audio out. So in order to have both inputs (Amiga+MAS-Player) you need an external mixer or a dual input amplifier/speakers.
OK... after I figured out what to do, I got all the necessary components from my local electronic store.
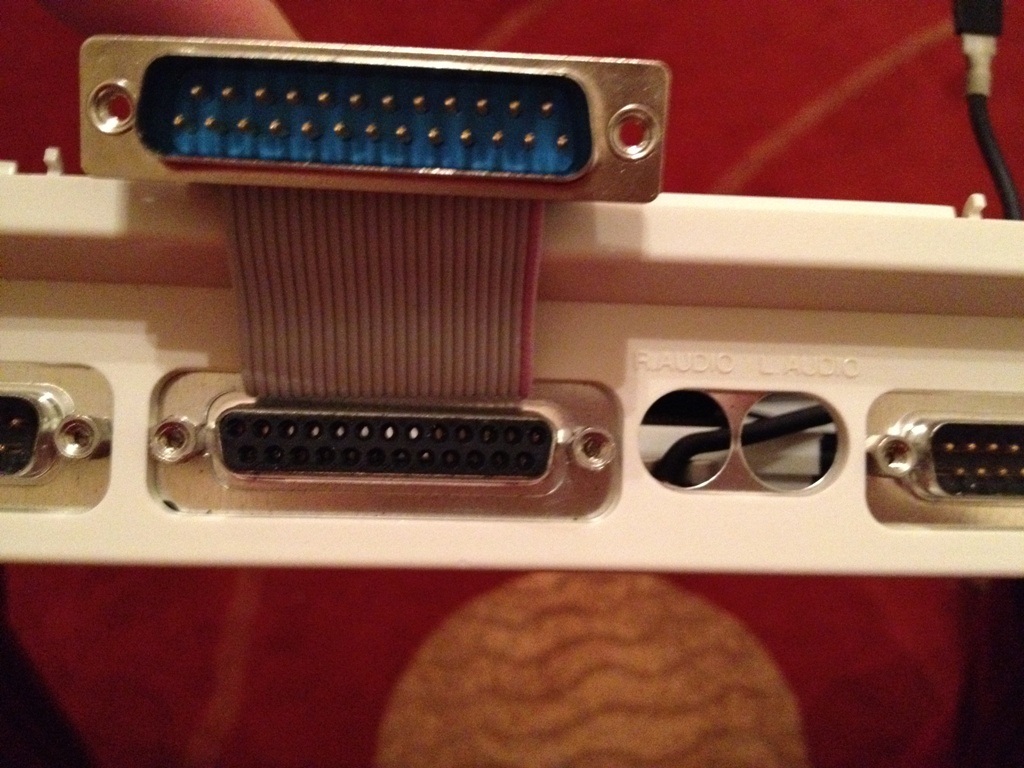
My initial thought was using an IDC 25pin connector with a ribbon in order to bring the parallel port inside! Of course I don't want to loose the possibility in using the parallel port in case I need to mount anything else (like a MIDI or Sampler unit).

Yep, it fits really well and whenever you want, you just disconnect the connector and you can mount everything else you like :)
If you checked clearly the above photos, you must have seen the lack of RCA audio connectors! :O
Where are they? lol
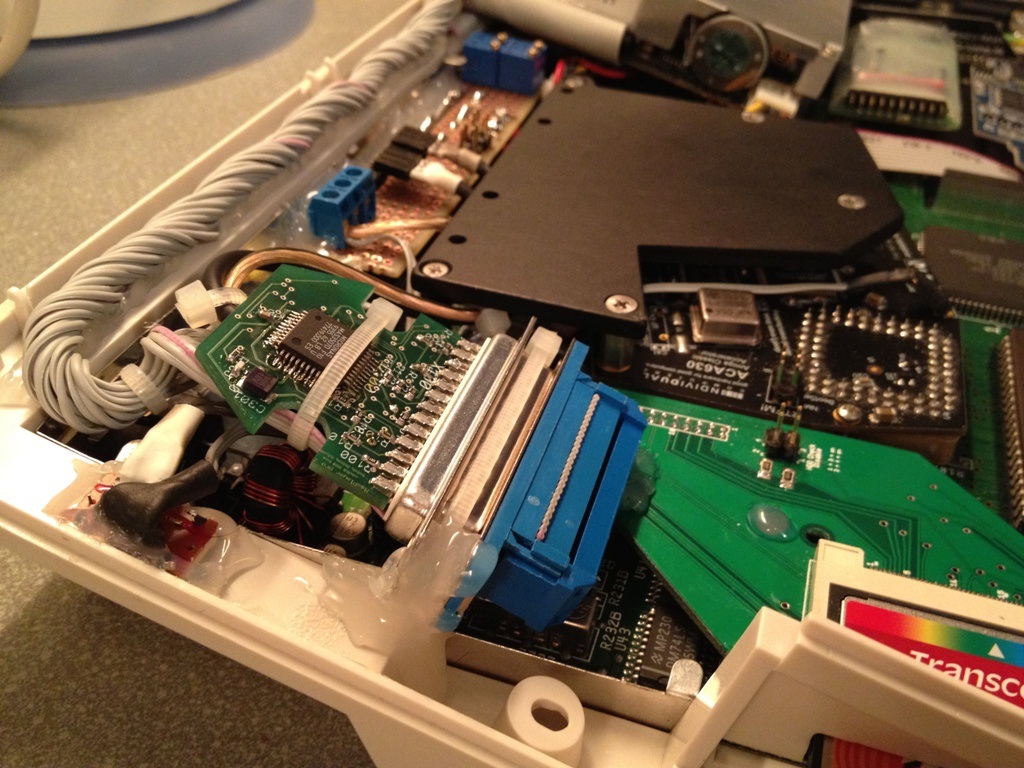
Putting the MAS-Player inside meant that I needed to make a simple dual mixer for audio output. I didn't want to be invasive to the case so I thought of using the default RCA connectors for the job, alas I desoldered them off :)

...and then soldered a cable in it's position.
After checking out Phipscube's Epic A1200D PPC custom mod, I thought of doing exactly the same mod of his Audio mixer that he used for his Delfina!
For whoever doesn't know what he did, he made a custom PCB audio mixer with some Pots per device and channel.
The only extra I putted on the custom PCB was a header for +5V/GND/+12V to be able to mount MAS-Player's juice and perhaps some fan in the future.
As you can see from the picture below, my custom PCB has the following:
- +5V/GND/12V connector on the left side,
- The Input angled Pin headers for MAS-Player and Amiga
- Pin headers for measuring the POTS! I tried without these and it was messy :)
- The default RCA connectors that are the mixed audio out
- ...And the POTS per device and channel

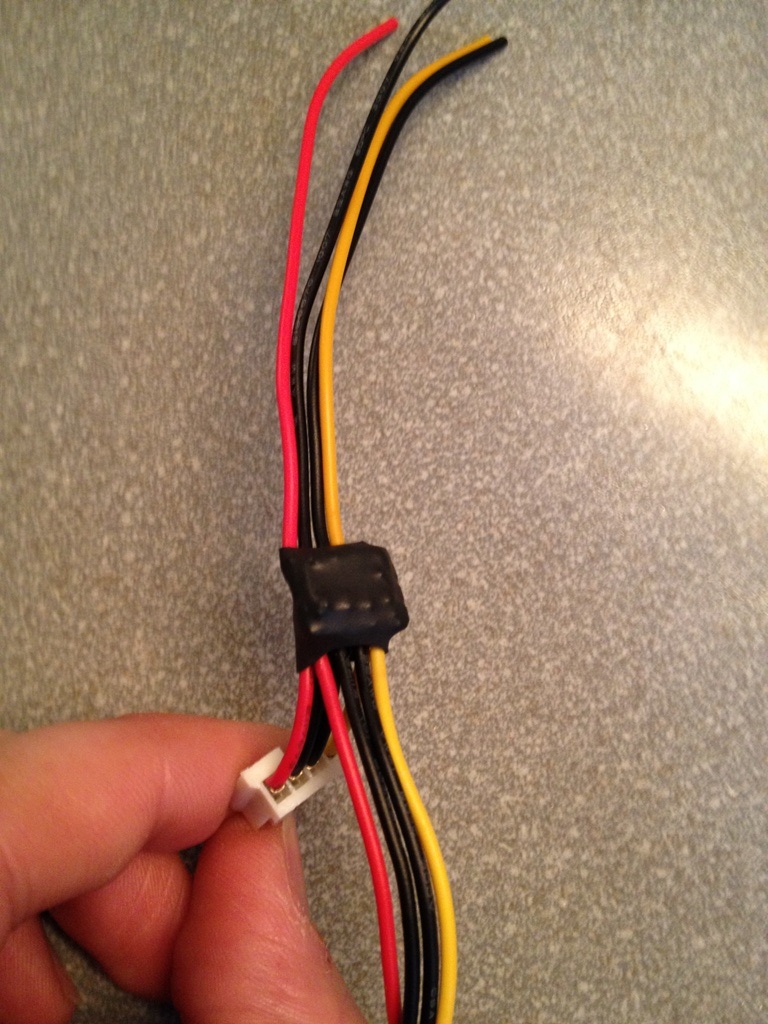
Here you can also see the custom power connector that I used. More pics on that later :)

This is what the connector looks like from the back... LOL it looks like robot eyes doesn't it?

And finally a picture from the lower part of the PCB with the cable mess :)

As I said before, I also needed some power that would be drained from the floppy connector, so I used a pico veroboard to mount 3 sets of cables in it and insulated it accordingly.

This is what the system looked like while I was doing the preliminary tests :)

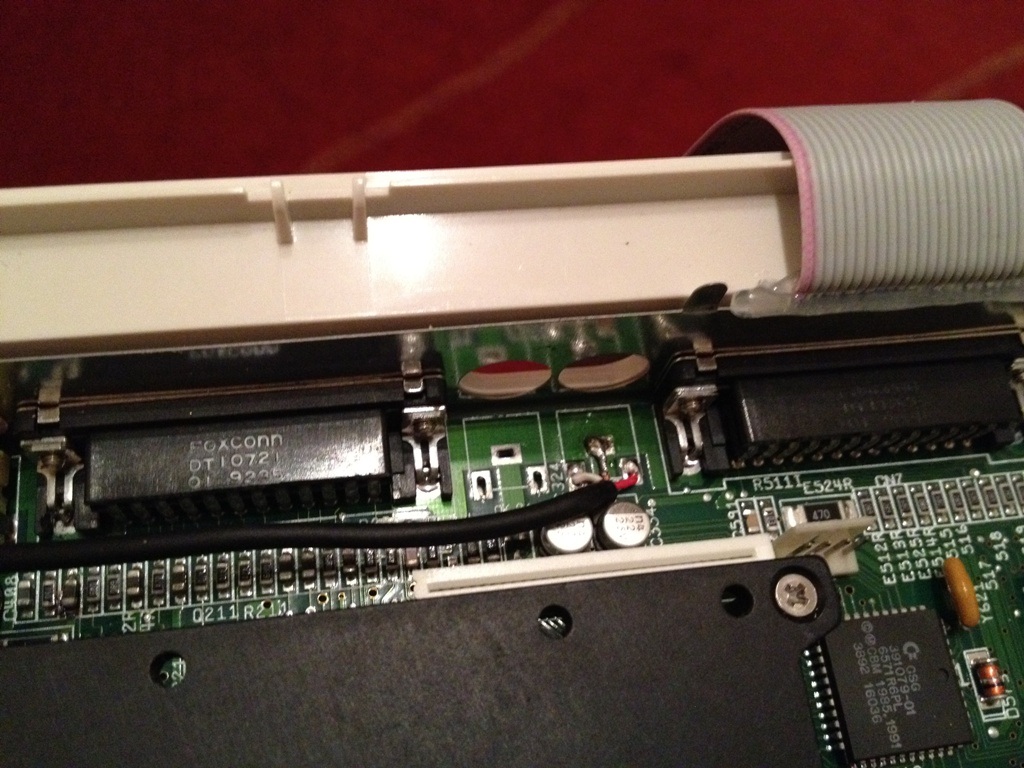
After hot-gluing my custom PCB in place, I had to start dealing with the ribbon! Damn I so dislike ribbons inside the Amigas. They grab so much space and don't allow proper airflow. That's why I decided as always on my Amigas... to convert it to round cable. Easy stuff, just separate each wire one-by-one! :)
...and Presto! Wire rounded, and hot-glued in place for better visibility and airflow :) I also used a bit of hot-glue to secure safely the MAS-Player on kipper2k's CF2IDE adapter.

Looking good doesn't it?
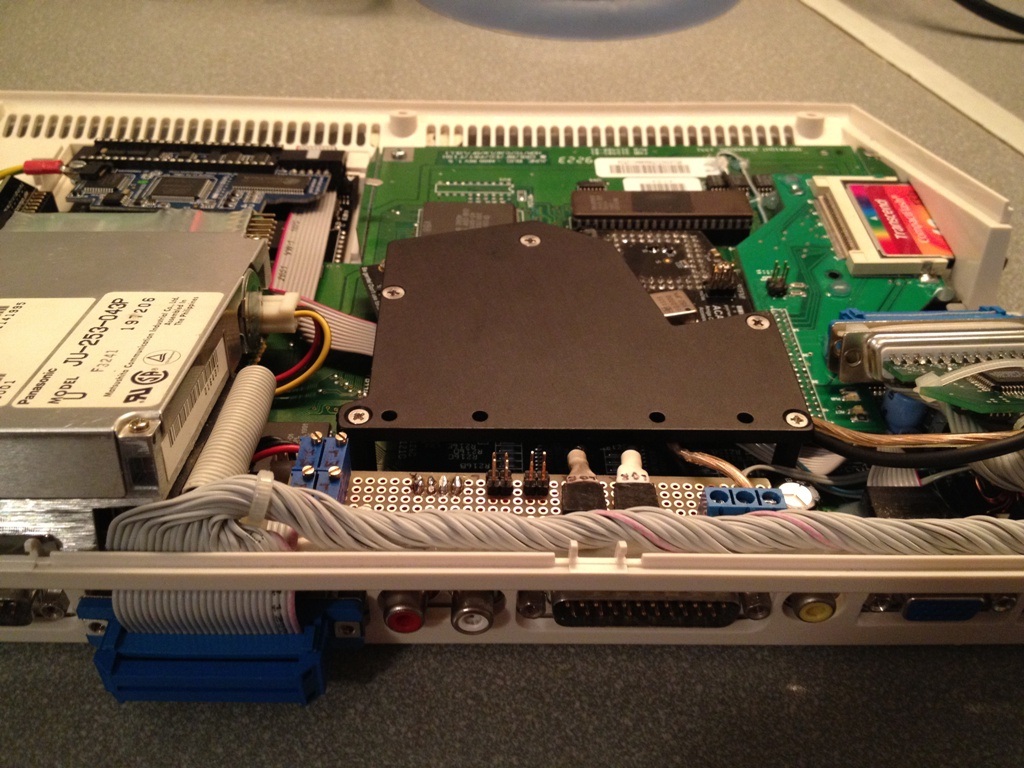
Just before I close this article... one panoramic photo as always. Tidy, beasty and beautiful :)

Stay tuned \o/